Tuesday, May 31, 2016

Don't stress the small stuff


So following last week’s blog I was thinking how often we look at clothing through history. The problem we face in this, fabrics until about 50 years ago were made mostly out of natural fibers. This means they break down. There are moments however when an outfit survives. It may have been kept out of damp and well-lit places until it is discovered and is able to shed light on its time period. Sometimes it is found on a body that has been preserved by the elements and so it sheds light not only on the time period but the person who wore it. Unfortunately, these chance moments are so few and far between.


One of the main sources of clothing is paintings, we sit there and curse at them because they won’t show us the back or the side of the garment. The problem comes when we are trying to recreate them. Here is where I stand on the matter. Here are the five things I think are most important to look at.

  1. Fiber available at not only the time but the location. If you are playing a Middle class person from the 1800s you are not wearing silk unless it is an evening gown and even then you are pushing it. Someone in the city is more likely to have this true, then someone in the country. Learning your fabric is as important if not more important than style but even today it is one of the most expensive types of cloth. Also it will effect how your clothes drape. If you are going to an event and you are wearing polyester instead of cotton or linen you will find the garment is going to drape very different and it will throw off the way the style is supposed to drape on you your body. In some cases, it will ruin the effect you are going for.
  2. Undergarments are the bases of how your clothing is supposed to fit. Those 16-inch waist in the 1900s, that was nowhere near natural. That was due to training and corsets. The poofs in the sleeves of the 1830s, there was extra fabric inside them that were often removable. Undergarments include extra petticoats, drawers/underwear/shifts, corsets/bras, undersleeves, underdresses, socks, head coverings and the list goes on. To get the outer look right you need to get the under look right. 
  3. Colors are very important. If you are middle class, solid colors are the best bet until the Industrial Revolution. After that look at the number of dyes used. The more dye colors the more expensive it would be. This is due to the way they dyed fabric during the early creation of this. For plain fabrics White, red, some blues, gray and others are easily accessible depending on the era. Look at paintings of the class you are trying to portray and see what colors are prevalent, which ones are not and then come to your own best conclusion.
  4. Now look at the silhouette. How does the dress show the hip, shoulders, chest or neck? Look at more than just one image from the time here. If you can look at originals. See if you can figure out where the seams sit, and how the cloth might have been cut to create the desired look. This is where originals come in handy. However sometimes there are no originals so make your best guess as to how the desired look is affected by different ways one garment might be made. This is more prevalent in very early garments. When images aren’t clear and there are no originals or badly damaged original garments then think it through, try not to over think it and come up with the best solution.
  5. So you have the cloth, the undergarments, colors and the silhouette now to put it all together and add the proper accessories. Think Hat, handkerchiefs, gloves, seasonal coverings, location, shoes, and jewelry.
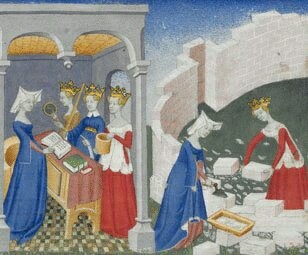
A well done dipiction of shilouettes through time

Heres where everyone does worry and I don’t think they should.

Thread counting, seriously if I am a house wife I am not making sure that I have 15 stitches per inch when I have a house clean, food to cook, a goat to milk and a baby crying in the cradle. If you are trying to claim you bought it in the store, or second hand go head do the thread count but if you are playing a housewife who made her own clothes, do the best you feel. I am not basting the stiches; I am still trying to go for a consistent spacing but seriously when I hand stitch my spacing is a lot closer when I am mad verses happy. I am sure for my Great Grandma it was the same. (Plus perfection is more of a modern concept)

Thread counting in knitting, also stupid. Anyone who knits can tell you, the yarn, the needles and the size throw off how many stitches per inch you have. Plus knits get so worn, so quickly there are very little originals that remain. They stretch, my socks are proof of this, they wear down and get fixed, and they differ based on size of needle and yarn gage. As long as you pay attention to the gage of the yarn at the time, the material and color at the time, counting stiches is more up in the air. Also if I am a knitter trying to recreate another knitter’s work I am not going to count how many stiches per inch and more cast on my stiches and do what I can to copy the stiches. My piece may differ from the original but I will do what I can to at least make it look like what I saw.

Slight alterations, as long as I get the silhouette I see in fashion plates I see as also fine. If I am a house wife who is making her own clothing guess what I may not see a finished one and so my guess is pretty good. Many of the house wives may be basing their clothes more on fashion plates then an already finished product. Same goes for knitting. If I am self-taught on how to sew or knit, that is going to change how something turns out. If I am taught by my mother, that is going to change how something turns out. If I have a lot of time to sew or knit, which means more practice, guess what, that is going to change how something turns out.

So stress about the five things above. Don’t freak out over thread counts, slight changes in where a seam sits. Yes these matter in some eras. Yes these matter if made by a sewing machine, or by a seamstress, or tailor but if you know who you are playing (their class, where they live, their home life) you can figure out how much you really need to stress about. (This is why I love playing people from the country middle class, I can tell the truth, I am self-taught/my mother taught me and I live a busy life caring for my home.)

Wednesday, May 25, 2016

Don't forget...


There are a few things I love about history. The first is that it is real people and real events that brought us to where we are. The second is it is always changing. Alright, changing isn’t the right word but I don't know what other word to use. We often think we know all we can know about history, (at least that is what they teach us in elementary school) but the truth is that evidence pops up every now and then that corrects our misconceptions about an event or people. Then there is the fact it is real life, from the lifestyle, the food, the clothing they wore and everything that put together a world.  Finally is that despite what we think it may be the past but it still effects the here and now, from inspiration in government, finance and home. Things I don’t like about informing people on this topic is the myths and misconceptions that everyone takes as truth when for a long time it has been proven untrue.

One of the biggest myths and misconceptions that drives me nuts is histories view on women. You know the weak, stupid and useless damsel in destress image. Now there are definitely a few women who have never fit the mold but it hasn’t helped the image anyways though it is starting too. Cleopatra, Godiva, Queen Elizabeth I and II, Jane Austen, the Bronte sisters, and so many more. These were strong women who made their mark on history but what about those who didn’t. We are learning more about them too. Images of medieval women working in men’s labors alongside men or even seemingly on their own. Records of women who took over their husbands business after their deaths. A recent relook at bones of Viking warriors were found that the armor did not make them men (like the original scientist thought) but in fact at least half of the bodies were women who clearly did some fighting. Some cultures that were thought to be patriarchal societies are proving to be equal, or matriarchal societies. Most of these like many Native American Tribes were seen as patriarchal because of a patriarchal society (the English) trying to make sense of what they found.

A women’s life was difficult and often oppressed but images such as these may hint that some women worked outside the strict lines of their gender. This image is from 15th century Italy.
Then there are the images of women couldn’t make it on their own. The term spinster comes from the women who did. Many women who never married or became widows took up spinning to help take of themselves and the term spinster was given to them. Many knitted or sewed to keep a roof over their head. For those that lost their husbands, like I said some took over the business. In The Return of Martin DeGerre, a book based on court records from a family in France gives an amazing look at not only a peasant family but a women’s lot. When a women’s husband is sent to war she continues to work alongside her family on the farm. (This is also about how she got duped by a stranger who claims to be her husband, which is why there is a court record.) And Queen Elizabeth served very well unmarried.

Women carding, combing, spinning and weaving wool in the 15th century.


Women are strong, brave and just as important to look at. A commercial for Dwight D. Eisenhower talked about how housewives were the backbone of America. They fed the family, made sure the children were cared for, managed the household finances and helped to educate the children for the future (the commercial’s words not mine). Women are as much the reason why our culture and our world is the way it is. So no matter how much we can be a pain in the rear and how many other problems we may have cause (Troy anyone) we are as important to remember when looking at history.   

Women worked full time and made up a majority of the work force during World War II. Many feeling independent for the first time pushed to give women the right to work. Until then it wasn't a common sight and the concept is still less than 100 years old. Before this it was extremely rare for women to pursue their own careers.

Tuesday, May 17, 2016

Bind a hole

 So it might be a little weird that one week I am talking about how to fix a hole and now I am talking about making a hole. There are times though when it is almost demanded that you make a hole in your work, from button holes to eye-let holes you need them to help with closures of items. I am not only going over how to make an eyelet hole but how to bind it once the hole is created.

What you will need

  • 1 awl or scissors
  • Thread
  • Needle
  • Scissors
  • Whatever you are putting a hole in.


And let us begin
Directions I

Directions 2, 3 and 4.
1.Take your awl or the point of your scissors and push it through your fabric creating your hole
2.With your thread and needle thread it so that the first stitch starts ¼ of an inch from the hole

3.Insert your needle down the hole that you have made and bring it up next to your first stitch wrapping the thread around the needle and pull up. Your stitch should look like a little L inside with the top of the L going into the hole.
4.Repeat going around till you meet up with your first L.

5.As you form your last L place the needle in next to the where you just brought up your final stitch up and cover your stitch again. Close of your stitch and repeat as needed and have fun.


Place your finial stitch right next to your last L

The finial look of your eyelets

Made a bag for the plug and beaters of my hand mixer


Tuesday, May 10, 2016

Awl Shucks...


He who made it sold it, and he who bought it, lost it? What is it?

Throughout time there have been tools to guide us. Intelligence in creatures and humans is judged by the use of tools. We are also said to have evolved because of the use of tools. From hunting and gathering to hunting and farming. To making our own clothing, the first sewing tools was probably two things a sewing needle and an awl. Sewing needles I have talked about before but I thought I would look at an awl.


Awls are a pointed tool to mark surfaces or creating small holes. Used in wood work, textile work, gardening, metal work, and just about anything you wish to use it for. My family uses an awl to line up the bolts on the docks in the spring. I used to use them when I was helping my dad when working on my car or wood working. (I’ll be honest he used them, I watched.) Recently I was working on some sewing and needed to create a hole in some linen. The Awl came in very handy in forming a hole without tearing at the fabric.

Although the word has been around since the 12th century, the tool is thousands of years older. The tool could have easily been made out of wood and stone to punch holes and mark things before they began creating them of iron.

So the answer to the riddle,

He who made it and sold it? The blacksmith and carpenter (if it has a wooden handle)

He who bought it and lost it? The carpenter, the thatcher (roofer), the blacksmith, the shoemaker, the tailor, the seamstress, and so many more.

Tuesday, May 3, 2016

Darn that hole part 2


So last week I talked about darning a wear in a thread worn piece of knitting. Unfortunately, sometimes you don’t get to it before it becomes a hole and when that happens you can still fix it.

You will need.

  • Darning egg
  • Yarn of equal weight, color and material as what was used the first time (I am doing contrast to see it better but also since the thumb was already contrasting.)
  • Darning needle
  • Crochet hook
  • Scissors


  1. Cut a length of thread and thread your needle
  2. Place your darning egg into the thumb so that it is lightly taunt around where the hole is formed.
  3. Clean up around the edge as best as you can.
  4. Insert your yarn where the hole starts and follow a knit pattern to the length of the hole from the bottom to the top.
  5. Go over a few rows and down a few rows to where you wish to start. Begin to follow the thread pattern as close as possible to the original stitching. Make sure you start a few stitches over and a few stitches lower then where it starts and go beyond the thin parts in every direction. The more you strengthen the surrounding area the better off you are in the long run.
  6. When you get to where the hole is follow the row and make your way back and forth filling in the hole with the new stiches surrounding the base stitches you made earlier. Continue to fill in and go beyond a few rows. Again the more you strengthen around where the hole was the longer your repair will last.
  7. Trim excess yarn or pull it through the work with a crochet hook.
  8. Wear it out and be proud of your work.